Monthly Archives: August 2021

The First Website

August 6 marked 30 years since the first website. Benj Edwards at How-To Geek has an excellent story about the origin. It began with Tim Berners-Lee of CERN posting to the alt.hypertext newsgroup to invite people to visit his World Wide Web project on August 6, 1991:

In 1989, a British software developer at the European Organization for Nuclear Research (commonly abbreviated “CERN”) named Tim Berners-Lee grew frustrated with how scientists shared research at his organization. With many different file formats, programming languages, and computer platforms, he found it frustrating and inefficient to locate electronic records and figure out how they should be used.

To solve this, Berners-Lee envisioned a network system using hypertext that would allow computers of different kinds to effortlessly share information over a computer network. That invention, first documented in 1989, became the World Wide Web, or WWW for short.

In 1991 I was going into my last year of college. I wouldn’t know about the www until 1996. That said, I was on the internet in 1993 using a service called eco.net which provided email and a few other online text-based services. But after a year of using that for school I discontinued the service. Then it would be two years before I started hearing of Netscape and websites. In 1998 I built my first website, hand-coded and uploaded via Fetch, around the time the young www had begun it’s first growth spurt with web-hosting services like Yahoo’s GeoCities.

Good times.

Obsidian Mobile

Finally!! Been waiting for this one for months. Obsidian Mobile released! I set this up on my Mac several months back but have been doing all my iPad writing in Taio or 1Writer because the mobile Obsidian app was not available. That’s worked out pretty well and frankly, I really enjoy working in both of the above mentioned apps. But I’m curious now to see how Obsidian works. After setting it up on the Mac I hardly touched it because I don’t really use the Mac much unless I have to.

So, I’ve now got a Vault set-up in iCloud for Obsidian. Will give it a whirl and add to the post when I’ve had a chance to spend some time with it.

Edit, two weeks later…

Okay, I’m back after a two week shake down. I can’t really say that I’ve explored the app as deeply as I expect to over coming months. But, I’ve given it a light shakedown and I like it! Many have commented that, as an electron app it does not have a native feel to the Mac, iPad or iPhone. I disagree. It certainly lacks the native UI elements a developer has access to but with the Minimal theme it feels close enough and looks quite nice.

The app is very stable and I’m having no problems with the switch from 1Writer and Taio. I’ve got both of those apps set-up to be able to access the Obsidian library should I feel the need to jump into one of those apps to edit. More importantly, I’d created a nice workflow for publishing to my blogs using Taio and that continues to work perfectly. When I’ve got a post written in Obsidian I can jump over to Taio and export to html then I load a new post in WordPress on Safari. It works pretty well.

And coming back again to add to this. I’ve now seen several different writers post on their Obsidian set-ups and have been following threads over at the MacPower Users forum. But today’s post by Federico at MacStories is certainly worth mentioning. It’s the first in a series on his Obsidian setup and covers Sync, Core Plugins, Workspaces and other settings. While I often find his posts interesting and sometimes helpful, he tends to go into a depth of detail that covers his very particular workflows that they don’t often translate well to how I use an app. So, I’ll at least skim his posts but unless I can easily see how it is relevant to my workflow I may not finish it. But his post above is very relevant in that it points a finger to the importance of Obsidian the plugins, various options and shortcuts.

After reading his post, the threads at Mac Power Users and a few others, the depth of features in Obsidian really do set it apart from most other apps. It’s easy to get started with the basics and then spend weeks or months just slowly poking around those depths to get to the many possibilities. That said, I’m glad it is based on Markdown files that other apps can access because even as feature rich as it is it does lack the export options that most other apps seem to have.

Using an iPhone and Apple Notes to Scan and Export Old Family Photos

I’ve started a project scanning in old family photos. It’s something I started years ago with a flatbed scanner which I no longer have. This time around I plan to just use my iPhone and Apple Notes. There are a couple things I’ve learned since getting started that might be helpful to others doing a similar project.

Before you get started scanning you’ll want to go to the Settings app and then go to the section for the Notes app. There you’ll see an option under the “Media” section to “Save to Photos”. Turn this on and every scan will be an image in Photos! Doing this eliminates the need to export from notes which the second portion of this post covers.

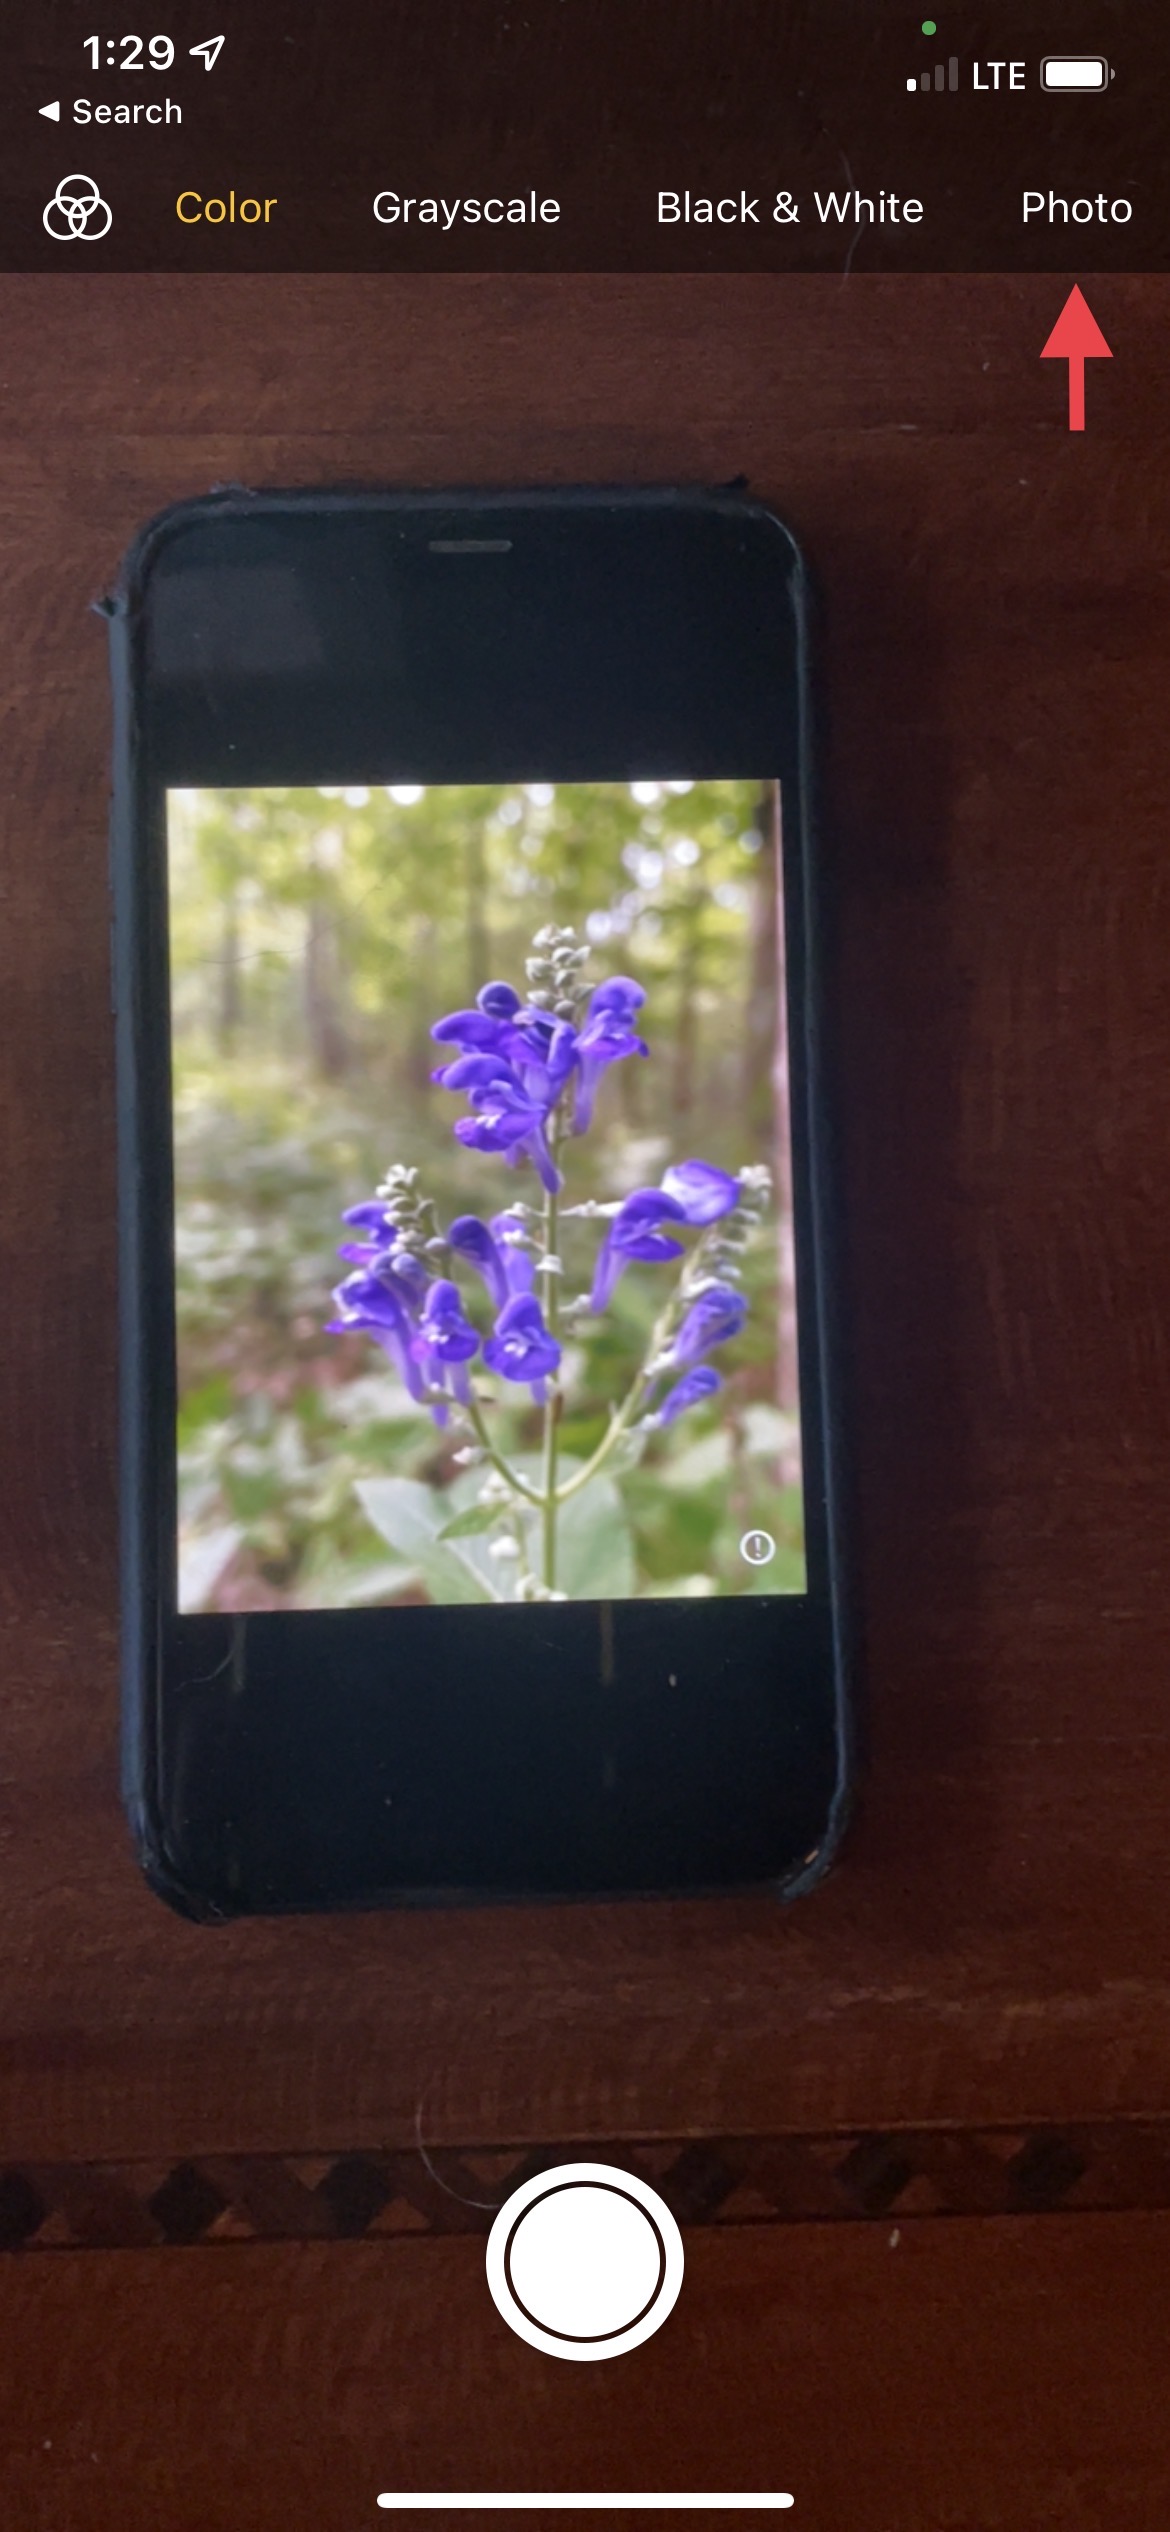
When you open a new note and choose the camera icon to open the camera you’ll choose “Scan Documents” which will open the camera and if auto is selected your iPhone will automatically capture a scan as soon as it detects a photo or document (In the image below I have mine set to manual). To stop the auto scan just put your finger over the lens or put the iPhone down on the table. It’s important to to note that the default scan assumes a color document, not an image. If you’re scanning an image, color or black and white, you need to be sure you select “Photo” as the media type being scanned. You can select this option before each scan or after.  To do so tap the  icon of 3 overlapping circles (for this post I’ll refer to that as the media type icon).

Select Photo option on the right side

Alternatively, just start scanning your photos and once the group is scanned you can go back and select “Photo” from the media type icon seen below.

If you scanned a group of images selecting Photo and then tapping Save will then save the whole group to the Photos app. So, to summarize, you can select Photo from media type before scanning or after, then you save the images after that by tapping the Save button.

A final note, it’s possible to save groups of photos as described above. You can also just scan one at a time marking each as a photo and saving it individually.

When finished you can confirm that all the photos have been autosaved into the Photos app. You may want to keep or delete the note once you’re finished scanning.

What to do if you’ve scanned images before setting them to save in the Photos app?

If you started scanning before discovering the setting I mentioned at the top of the post that  saves your scans to photos automatically, you’ll have notes full of pdf scans that seem stuck as pdfs. There’s no built in way to export those pdfs to Photos. But, there’s an easy two step process to get the scans to photos.

Before you jump into the export process an optional but important step is to confirm that your scans were done as Photos. Tap a scanned image in a note to open it. Then look in the toolbar for the three overlapping circles icon for selecting media type. Tap that and then select “Photo” as the media type. If you have a group of photos saved in a group you’ll need to go to each photo in the group and do this step. Once you’ve done this for all the scans in the note you can move on to the export.

First, you have to save the pdf scans from Notes to Files. Just long press a note with scans in the list view of your notes. In the context menu chose “Send a Copy”. From the list of options choose Save to Files. Choose the location to save your pdfs and save. Then open the Files app to that location. You’ll see a pdf or multiple pdfs from that note. If you scanned images in groups you’ll have multi-page pdfs consisting of each image.

For the second step, you’ll need this simple Shortcut which will save the pdf as an image or images to the Photos app. Install the above Shortcut into your Shortcuts app. It’s a simple 3 step Shortcut. Once installed you can select your scanned pdf file then tap share, then select the Shortcut “Convert and save to photos”. The Shortcut will run and when finished your image or images will be in the Photos app! It’s also possible to choose multiple pdfs at once and share to the shortcut as described above and all the pdfs will be processed at once into the Photos app.

That’s it, you’re done!